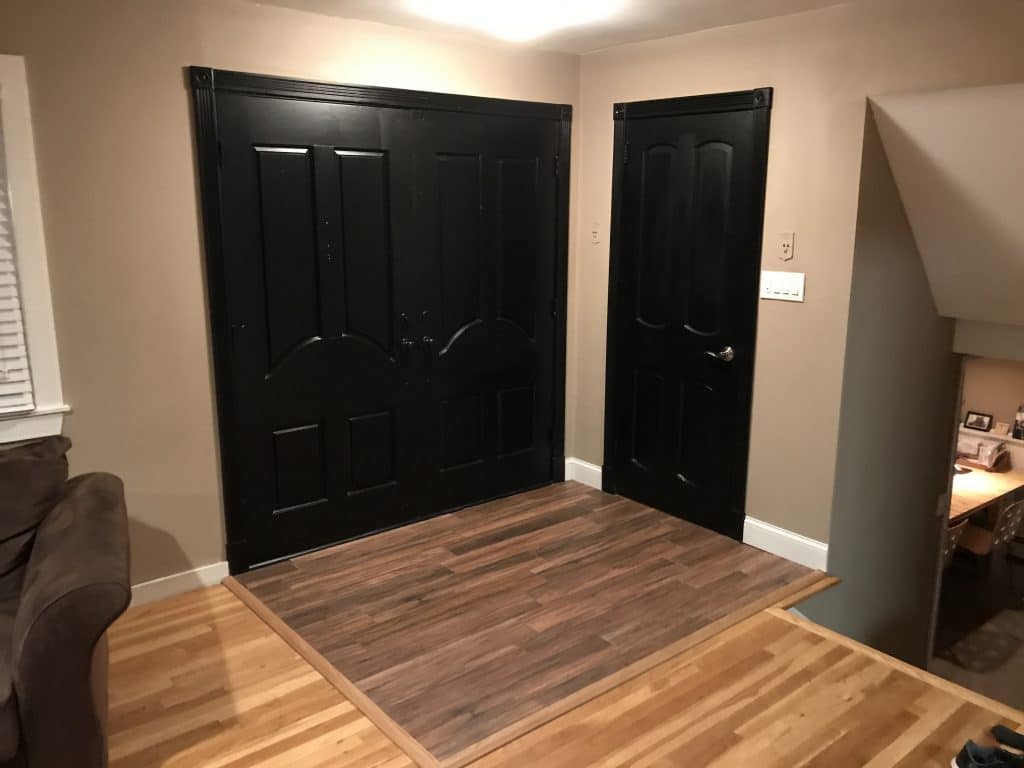
I’m a big fan of a lot of home decorating blogs. I like when they do a room makeover and there’s lots of before and after pictures. Those are always pretty fun. So I thought why not give it a try. I’m already doing a lot of DIY projects. Why not pick a spot in our house that needs an update and get it done and then blog about it. Well that’s what I’ve done. This post is going to be about my Entrance Makeover.

The entrance to our house isn’t really separated from the living room area. We live in an open concept house. The dining room, living room, great room are all together and the entrance is part of that. So when you walk into our home there’s a coat closet and a tiled rectangle area of floor where you can take off your shoes before you continue in. The rest of the first floor is hardwood flooring so the tiles are a nice way to define the entrance from rest of the floor.
We also have this ridiculous 4 gang light switch plate that’s ugly shiny gold and it has a 1970s timer switch in it to make it look even worse. The timer doesn’t even work anymore so it’s just an ugly knob highlighted by shiny gold. There’s also these alarm switch plates too. Those alarms never worked when we moved in 18 years ago so I painted over them to hide the nasty silver covers with the red light and keyhole on them. We’ve since gotten wireless alarms so it was always on my list to pull off the covers, make sure there’s no current in any of the wires behind there and Sheetrock over them.
The Tiles
Okay so the first thing to do on this project was to get rid of the old tiles. I recently re-tiled the kitchen (should have blogged about that but didn’t) and so the entrance tiles should match the kitchen. Hey I’m not really a design blogger but that just made sense to me. When we first moved in we had these chocolate brown circular tiles there and I replaced them with very neutral beige tiles. So I bought more of the same tiles that we used for the kitchen and started pulling up those old beige tiles.

Pulling up tiles is not a fun job. You have to use this tool that’s like a flat shovel and wedge it under the tile and pop it up. It cracks and makes dust everywhere and then you have to clean up. But the worst part about it is that the mortar usually remains there. And that has to be chipped away. Now that’s a slow and tedious process.
After like 9 years of slowly chipping away the mortar with a chisel and a hammer, I finally gave up. I needed to make a flat surface to lay the new tile on but with those tools I would still be there today, chipping away, inch by inch and never finish. So Plan B was to get my belt sander out. I figured that if I just made it flat enough, it would work out okay. I saw some people using a grinder with a special mortar removal wheel on it but I don’t have a grinder. The belt sander worked well enough. And then after a major clean up of dust and mortar chips, I was ready to tile.
Tiling is actually kind of fun. I’ve done a lot of tiling projects in our house and I really don’t mind it. This project was quick because it’s a small and rectangular space. The cuts were straight, the pieces went in quickly and there were not gotchas. And after one day of using the back door to get outside, the mortar had dried and I was much closer to finishing my entrance makeover.

Next up was the grout. We went with a brown grout to go with the wood look tiles. Have you seen these type of tiles before? They seem to be pretty popular. They’re long and thin like wood flooring but they’re ceramic tiles. The dark brown grout went nicely with the brown wood look tiles.
A few years back I painted the front door black. It looks great from outside but on the inside of the house the door was painted white. This always bothered me. So I took this opportunity to paint the doors black too. Not sure what to do with the trim, I painted that black too. Maybe that was a mistake but it looks pretty good to me.
The Switches

The last item on the entrance makeover to do list was the ugly light switches. Since one of these switches is for the outside lights, I decided to install a WeMo smart switch. These switches are great. They work with Amazon Echo so you can say things like, “Alexa, turn on the front lights.” Also it’s great to come home from work in the winter when it’s dark out and turn on the lights from your phone. No need to fumble around in the dark. You’d think that it would be easier to get the kids to remember to turn on the front lights for you than to install a smart switch but you’d be wrong.
The WeMo switch is wide style, so I got 3 new switches that match the look and then got a less ugly 4 gang switch plate to finish it up. Without the broken 1970ies timer and with the new WeMo switch, it looks much nicer.
And so that’s the end of the entrance makeover. Here are the after pictures. It takes a lot to get to the “after” but it was worth it.


The alarm switch plates will be on a future to do list but I’m happy with how this entrance makeover came out.

